
Chronicle of a DGT Electronic Board Repair
It is undeniable that DGT electronic boards are both expensive and delicate. Given their increasing use in competitive events, it is essential to follow proper handling practices to prolong their lifespan.
Prevention: Avoiding Damage and Short Circuits
The risk of failure is highest during connection and disconnection:
- Constant Monitoring: When powering up a serial setup of boards, stay alert to error messages in LiveChess. This allows for the timely detection of a potential short circuit in the chain before damage propagates.
- Connect and Forget: Once the power is connected and the serial setup is functioning, avoid connecting or disconnecting individual boards at all costs. Performing this while the power is live is a frequent cause of board failure and electrical surges.
Diagnosing a Common Failure
If a board is not detected by the system:
- Direct Test: The most effective diagnostic method is to connect the board directly to a computer using an individual USB cable (bypassing the serial setup).
- The Verdict: If the board is not detected via this direct method, it is almost 100% certain that the mainboard has suffered damage due to a short circuit or electrical discharge.
The Repair Process (Mainboard Replacement)
To repair this type of damage, you will need to purchase a replacement kit.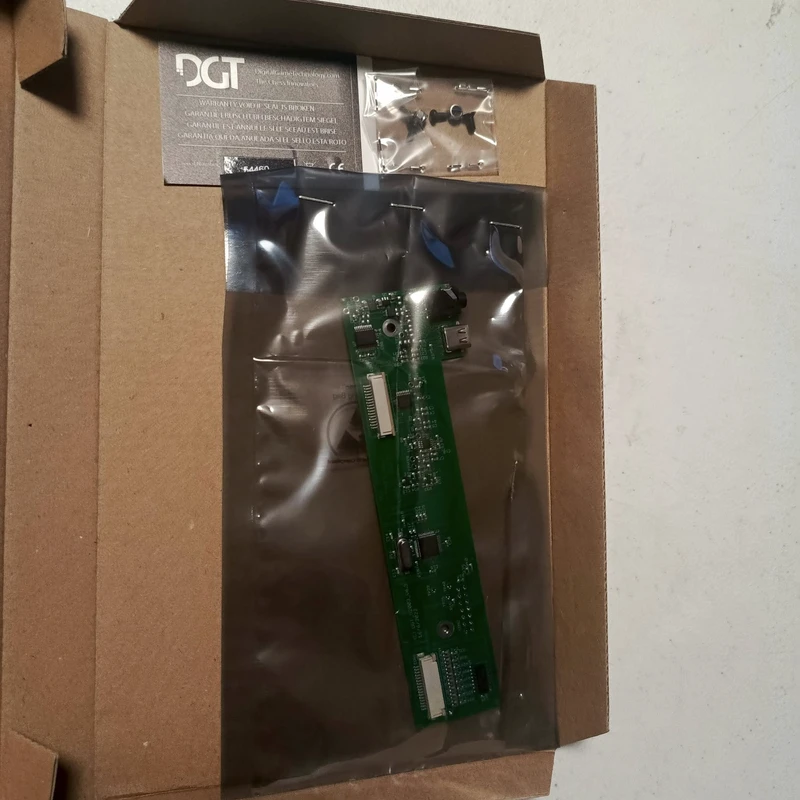
- Repair Kit: Typically, this is a "Smart Board Repair Kit," which includes the mainboard and the necessary screws. The approximate cost is €83 (plus shipping from Netherlands and import taxes).
- Recommendation: It is always preferable to have the replacement performed by an electronics professional. However, if you choose to do it yourself, the following precautions are essential:
Safe Handling of FFC (Flat Flexible Cables)
Replacing the mainboard involves the delicate handling of Flat Flexible Cables (FFC). This is where most mistakes occur.
- Disconnection: Unlock before pulling. Lift the locking clip or lever on the connector, then pull the FFC gently and straight out. Never yank the cable without unlocking it first.
- Insertion: Smooth Alignment. Slide the cable in gently and straight. Do not twist or force it. The Smart Board features an "In" and "Out" bus, meaning you will need to connect two FFC cables whose terminals have different positions/orientations. Pay close attention to this difference. I recommend starting with the FFC furthest from the USB connector to allow for more maneuvering space.
- Alignment: Ensure the cable terminals are perfectly aligned and fully inserted before closing the locking clip or lever.
- Tools: Use non-metallic fine-tipped tweezers to guide the cable, as the internal space is very limited.
- Grip: Hold the cable by the stiffener or plastic tab (the rigid material at the end). Avoid touching the gold terminals at the tip.
- Protection: Use gloves and an anti-static (ESD) wrist strap, as these FFC cables are highly sensitive to static discharge.
I hope these tips lead to a successful repair and that your DGT Smart Board is back in perfect working order for the next round. Good luck!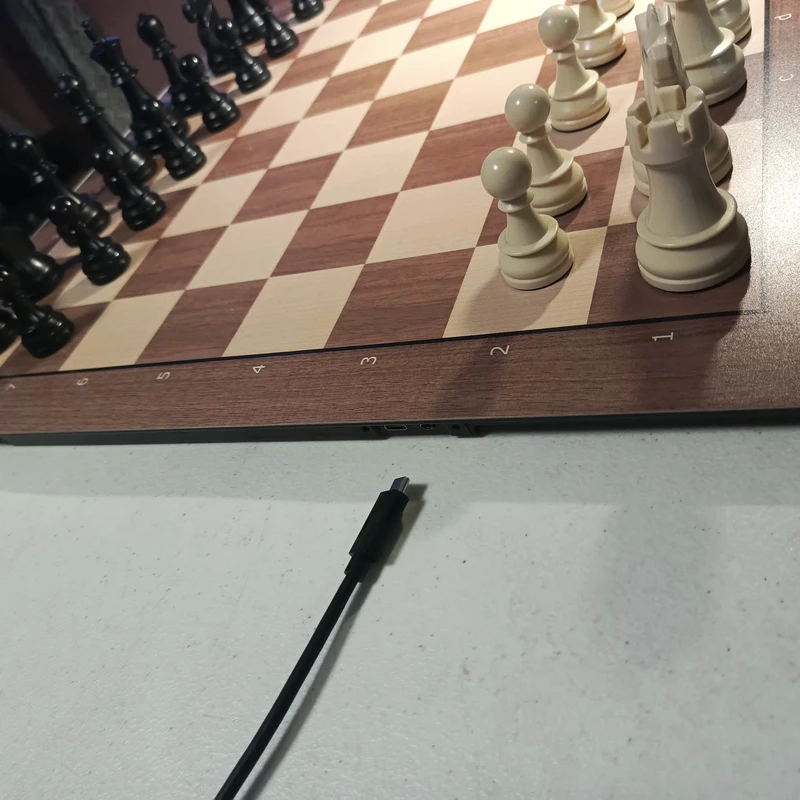
Discuss this blog post in the forum SHORTCUT
 ChessMonitor_Stats
 thibault
 SHORTCUT
 NDpatzer
 SHORTCUT
You may also like
SHORTCUTComo agrupar transmisiones en lichess
Paso a paso como usar la nueva opcion de lichess para agrupar tus transmisionesChessMonitor_StatsWhere do Grandmasters play Chess? - Lichess vs. Chess.com
This is the first large-scale analysis of Grandmaster activity across Chess.com and Lichess from 200…thibaultHow I started building Lichess
I get this question sometimes. How did you decide to make a chess server? The truth is, I didn't.SHORTCUTProtecting the Board: The UTi260B's Role in Anti-Cheating Chess
Unmasking Cheat Devices: The UTi260B Thermal CameraNDpatzerScience of Chess: Seeing the board "holistically."
Better players may read a chessboard in the same ways we recognize faces.SHORTCUT