A valuable lesson in chess
A old game to learn from!To begin with! I do NOT take cerdit.!! Or claim the following material, is mine, ore is author of the original material
I am NO, GM - IM, or have a FM title, nore do I have a ELO/rating of any master, or FIDE, etc. level.
All cerdit for the following material, MOST go to Dr. Max Euwe. (Born. 1901. dead: 1981)
How ever, I like to belive that the following game can help most player.
The game.
Opening: Spanich game.
White : M.Botvitnnik
Black: Dr.M.Euwe
Year: 1934.
1.e4 - e5.2.Nf3 - Nc6.3.Bb5 - a6.4.Ba4 - Nf6.5.0-0 - Nxe4.6.d4 - b5.7.Bb3 - d5.8.dxe5 - Be6.
Now this line is play like a million times every day, and have been know ́n for aboud 500 years ca.
The line in it self etc, is not importen here, but what I am trying to point out, is the strategy and tactics, in this position,as well as the plan wich both player is using, wich you can use in almost any game, no matter the opening/line.
NOTES the position here.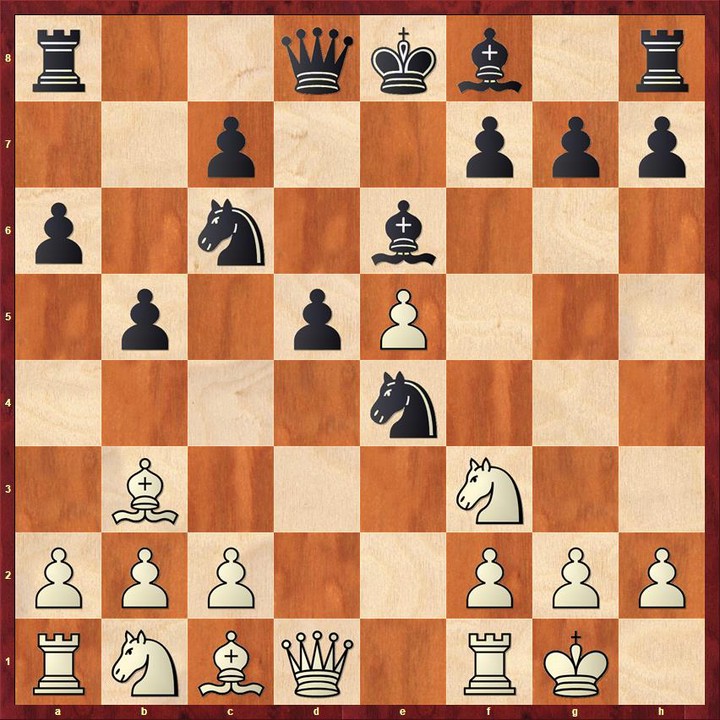
This is a well known variation of the Spanish game, that implies different advantages and disadvantages, for both sides, that I am not going in to ( that is NOT THE POINT, for this blog ) But I am going to try and examine the position that have occured.NOTES! White has 4 pawns against 3, on the King side, and Black have 4 pawns , against 3 on Queen side.)
If wee try and take a look at the position, with only pawns and Kings. Wee will see what that meens:
( the position of the kings is not importen.but the number of pawns on each side of the bord. )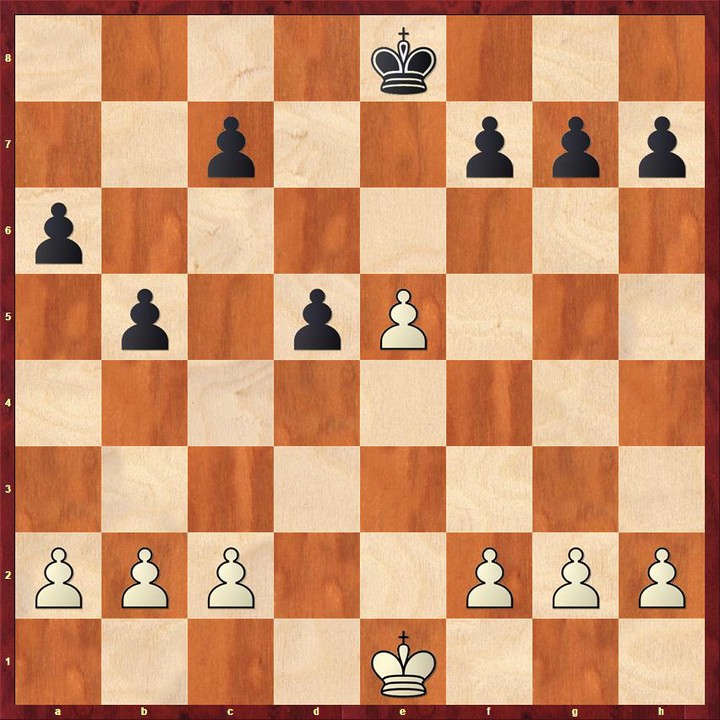
it is our strategy and tactics, to use our pawn majority, on the King side.Therefore White, most try and take the initiative, which involve that we must "march forward" towards Black King.
On the otther hande, it is Blacks strategy, to "march forward" against Whites Queen side, using the pawn majority, on the Queen side.Both side have therefore a double strategy plan.Whites plan is to go on the kingside,and stop the enemy advance on the Queen side. on the other side it is Black's, strategy to defense on the kingside, and attack on the Queen side.
9.c3 - Be7.
Both White's and Black's, following moves are entirely consistent with this plan.
To attack on Black's kingside ( remember this is Whites strategy ) White, need his White bishop,this explains White's last move, which stops Black from taking it, with a move like Na5.for strategic reasons, it is logical for Black, to move the bishop to e7, and not c5.On c5, the bishop will be in the way for Black, freeing move c5 with the move c7 - c5, wich will free Blacks queenside attack.
(Notes: It is possible for black to play this move. eks. 9.c3 - Bc5.10.Bc2 - 0-0.11.Nbd2 - Bf5.12.Nb3 - Bg6 = ( with equal position )
10.Nd2 - 0-0.
If White want to be able to attack Black's king,we most first move Black ́s knight, from e4.This is the point in Whites last move. Blacks last move completes Black's development, and Black is not forced to move the Knight.It is black's strategy, if the kingside is not secure, black cannot carry out his plan on the Queen side.The tactical elements of blacks last move include, among other things, calculation of the following moves: 11. Nxe4 - dxe4.12.Bxe6 - fxe6.13.Nd4 - Qd5.14.Nxc6 - Qxc6.15.Qg4 - Rac8.Which gives the result that Black has better mobility, and Whites e5 pawn is weaker than black's e4 pawn.
Position after Blacks last move: 10. ... - 0-0.
11.Qe2 - ... ( this attack Blacks Knight, and therfor Black, most now decide where go with the Knight. )
11. ... - Nc5. ( posible is also: 11. ... - Nxd2 12. Bxd2 - Na5, or 11. ... - Qd7 12 Rad1 - Rad8, and 11. ... - Re8.12. Rad1 - Qd7 = ( with equal position ) But from a strategic and tactical point of view, it makes sense to keep the Knight.)
12.Nd4 - ... ( we would perhaps have expected 12.Bc2 - .... But this would have been followed by d5!. And the following calculation.: 13.cxd4 - Nxb3.14.Nxd4 - Qxd4.with the result that Black, would have increased his freedom of action, and Whites king side attack, is limited.Also now White is not able to stop Black from playing c5.
12. ... - Nxb3. It is possible for Black, to eliminate Whites bishop on b3, with out first exchange on d4, because for the tactical finesse, that 13. Nxc6, can be refuted with Nxc1! and 14.Nxd8 is answered with the strong replay Nxe2+, wich looses a tempi, and neither Raxc1 or Rfxc1, is good, since this is answered with the replay Qd7.15.Nxe7 - Qxe7..........
Dr.Euwe. point out 3 resons for the exchange her.
1.The exchange of several pieces has reduced White's attacking possibilities.
2.Black can make the task easier to liberates and mobilize the majority on the Queen's side.
3.White has a more difficult task in unlocking his plan, and cannot easily carry out the push with his f pawn.
position after 12.Nd4 - Nxb3.
We will now see that the next moves will be around the control of c5.
13.Ndxb2 ( keeps the c5 under Whites control ) Qd7.14.Nxc6! - Qxc6 ( without this exchange, Black could easily reach c5 after 15. ... - Nd8. )
15.Be3 - ... ( After the previous explanations, this bishop move is not difficult to understand. With Be3 - White keeps the c5 under control, and at the same time, restrict Black possibility of easy, to release the Bishop on e7, and freeing the opportunity to play c5. )
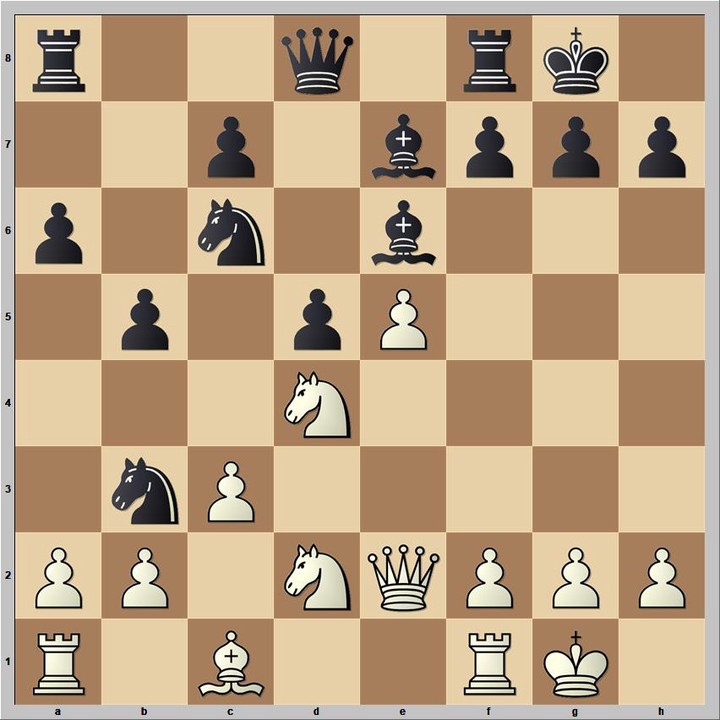
Position after 14.Nxc6 - Qxc6.15.Be3 - ...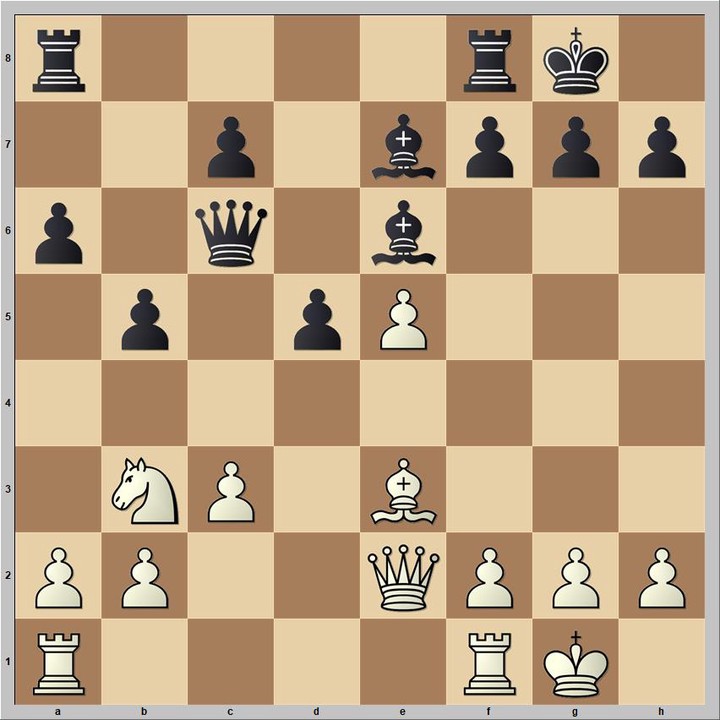
15. ... - Bf5.16.Rfd1 - Rfd8
Black cannot reinforce c5 and must therefore humbly watch White take possession of it. Black last move, gives the d pawn extra protection so black can follow up with Qg6,that threatens Be4.
Position after 16.Rfd1 - Rfd8.
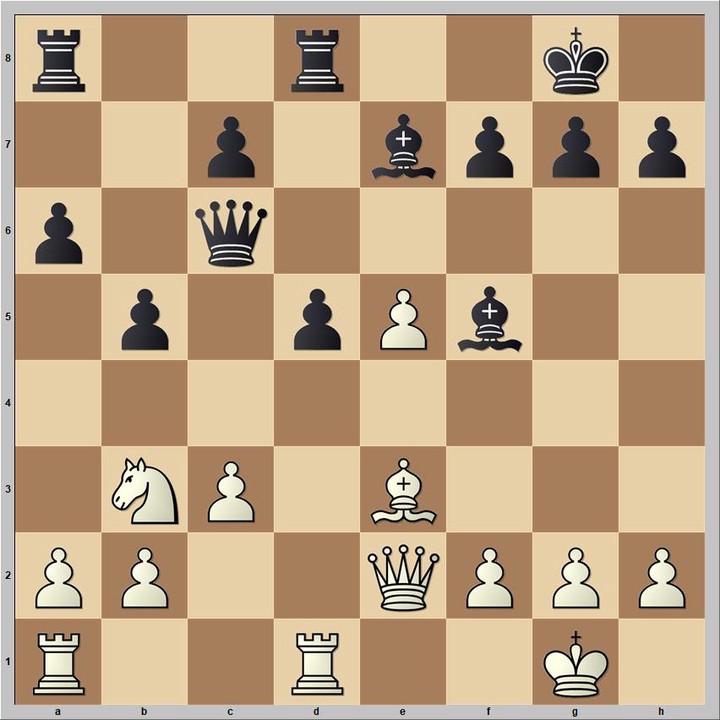
Dr. Euwe. Drew our attention, to a tactical twist in the game here, which is of great importance for our study.Because it seems that White can immediately occupy c5 with: Na5 - Nb7 and Nc5.
( eks. 17.Na5 - Qg6.18.Nb7 ( all with tempi ) follow with Nc5. But! Black have the strong answer 18. ... - d4! which strongly threatens Be4, with double attack on g2.After the obviously forced continuation Sxd8 dxe3, the knight is closed in, as Nb7 is stop by Be4, with same threat as mentioned before.
Dr. Euwe. Point out! Wee should not allow ourselves to be tempted by these apparently tempting elements, but insted focus on the tactical elements that are in the position. There is a warning sign here BEWARE!
Without such a signal, even the strong player can fall as victim to these combinations.But luckily the warning signal is there and it's not hard to see, so long that we are aware of this.placing a Knight ( Na5 ) in the enemy camp must be done with caution.
17.f3 - Bf8. ( White prepares the way for Qf2, without this we will lose control of c5. Black expects that White's bishop will soon appear on c5, and therefore withdraws his bishop, so wee do not lose time on this later.)
18.Qf2 - a5.The tactical plan, which, among other things, consists of keeping the bishop pair, after 19. Bc5 - ...can be follow with, a4, 20.Bxf8 - axb3.21.Ba3 - Bc2. follow by 22. ... - Rxa3, and Blaks game is very much alive. There is another way in which Whites, bishop, could occupy c5, and that is with.19.Nd4 - but after Qg6.20.Nxf5 - Qxf5. Whites e pawn (tactical) is weak and after: 21.f4 - b4. now 22. Bc5 is impossible due to Bishop exchange Bxc5 follow by Qxf4, with an advantage for Black.
To be continues